| 7. E-commerce |
| |
| Need to sell your products or services online? Netfirms hosting works with virtually every major e-commerce and payment gateway and includes tools that can get your online store up and running with just a few clicks. |
| |
| 7.1 How to Create an E-store with Netfirms Commerce Pro |
| |
| Netfirms Commerce Pro allows you to set up an online store including a shopping cart. You can either integrate it into your website or use it by itself. You can add Commerce Pro to your domain from the Site Tools menu tab. |
| |
Steps:
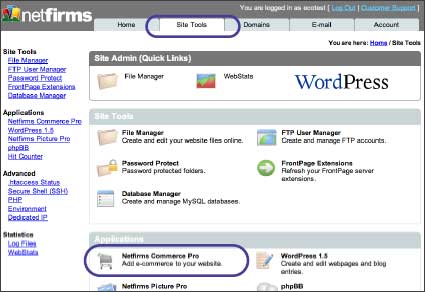
- Click the Site Tools menu tab.
- Click the Commerce Pro icon.
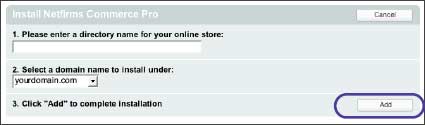
- Click the Add New button.
- Enter the directory name.
- Select the domain name from the drop-down menu.
- Click the Add button.
- Onscreen you will see a listing for your new E-store, with the web address you can use to access it. Typically you would link to this address from your website homepage.
Once you have added an E-store you will want to configure it for your needs, e.g., adding products, your company name.
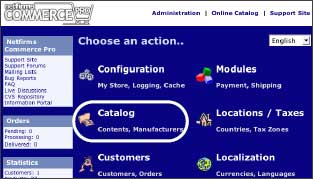
- Click the Admin button adjacent to the Commerce Pro E-store you just installed.
- The Commerce Pro admin interface will open in a new window. Click the Configuration link and edit your store name and contact e-mail address values.
- Click the Catalog link and remove the sample product categories. You can add your own products and categories. For each product you will need a picture and a description.
- To accept credit cards refer to section 7.2
|
| Tips: To restrict certain portions of your website, perhaps to registered users, place the restricted files in a common folder and then password protect that folder. |
| |
| Notes: A user can only access a file or directory if their username and password matches the information you entered on this feature. Netfirms provides you with a list of the usernames and passwords you created so you can securely keep track of them. |