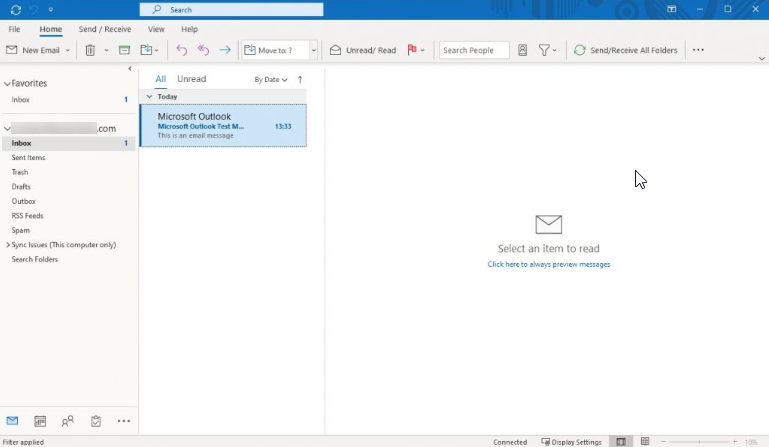
Email Client Setup: Outlook 2016, 2019, and Outlook 365
We no longer offer Microsoft Office 365 products at this time. If you have already purchased Microsoft Office 365, you may continue to manage your subscription through the Account Manager. If you are looking for a professional email solution, Google Workspace is an excellent alternative for a professional email and provides a full suite of productivity and communication tools.
Setting up your email with Outlook 2016, Outlook 2019, and Outlook 365?
You will need your incoming mail server, outgoing mail server, full email address, and email password. The default settings are listed below.Non-SSL Settings
| Outbound Server SMTP | smtp.netfirms.com | Port 587 |
| Inbound Server IMAP | imap.netfirms.com | Port 143 |
| Inbound Server POP | pop.netfirms.com | Port 110 |
With SSL Settings
| Outbound Server SMTP | smtp.netfirms.com | Port 465 |
| Inbound Server IMAP | imap.netfirms.com | Port 993 |
| Inbound Server POP | pop.netfirms.com | Port 995 |
What is an SSL for an Email Server?
SSL, TLS, and STARTTLS are standard protocols to secure email transmissions. SSL (Secure Sockets Layer) and its successor, Transport Layer Security (TLS), provide a way to encrypt a communication channel between two computers over the Internet.
We can always provide our server settings and walk you through setting up your Outlook. However, we cannot help troubleshoot errors specific to Outlook.
Setting up Outlook 2016
The instructions below will guide you through configuring the Email Account with us on Microsoft Outlook 2016.
Note: In the example below, we will configure the email account using SSL Hostnames for SMTP and IMAP protocols.
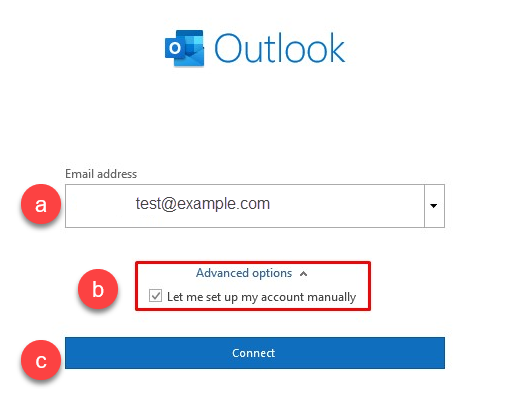
a. Enter your Email Address.
b. Check the box that reads, "Let me set up my account manually."
c. Click on Connect.
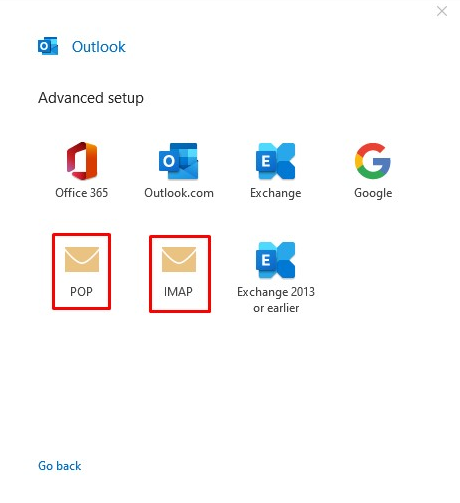
Step 2: Select POP or IMAP, depending on the Incoming Protocol you prefer. In this article, we have selected IMAP.
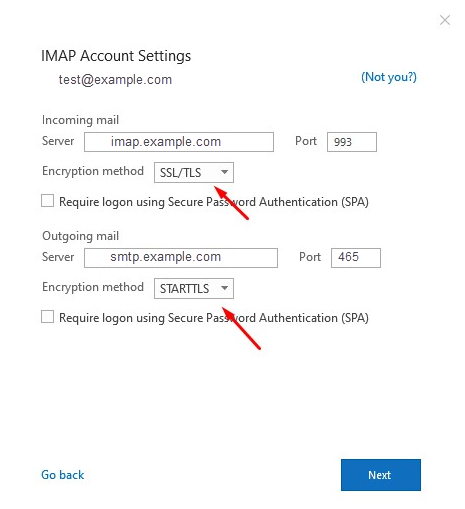
Step 3: Refer to the Email Client Settings below, and based on your preferences, enter the respective hostnames, port numbers, and encryption methods for the Incoming Mail and Outgoing Mail servers.
Enter the following information
- Your Name: Customers Name
- Email address: example@customersdomain.com
- Incoming Server: pop.netfirms.com or imap.netfirms.com
- Outgoing Mail server: smtp.netfirms.com
- User name: Customers Email Address [example@customersdomain.com]
- Password: Password to the customer's email address
Click on Next.
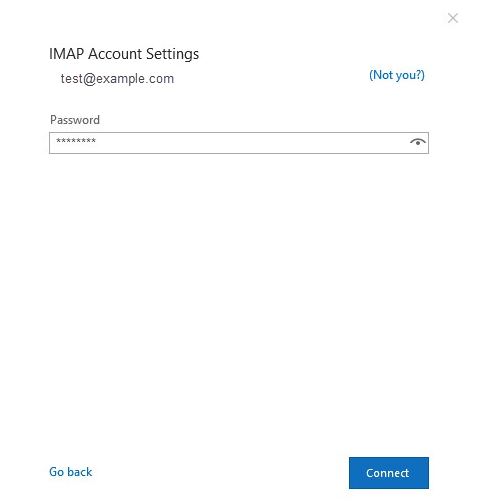
Step 4: Enter the password for your email account with us and click on Connect.
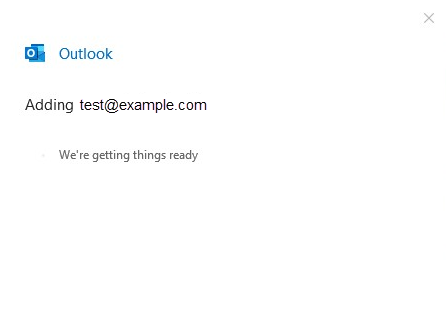
Step 5: Your email account has been configured successfully!
Click on Done to conclude the process.
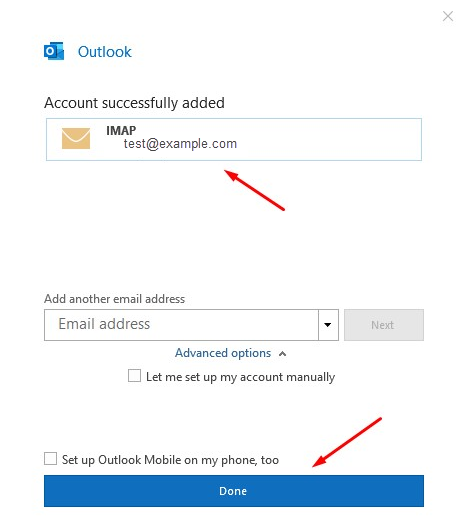
Step 6: You can now send and receive emails on your Email Client.
Setting up Outlook 2019
The instructions below will guide you through configuring the Email Account with us on Microsoft Outlook 2019.
Note: In the example below, we will configure the email account using SSL Hostnames for SMTP and IMAP protocols.
Step 1: Launch Microsoft Outlook 2019 on your computer. If you are launching it for the first time, you will directly see the window as shown below. If you have some other email accounts configured on Outlook already, you can click on File Menu > Add Account to see the window as shown below.
a. Enter your Email Address.
b. Check the box that reads, "Let me set up my account manually."
c. Click on Connect.
Step 2: Select POP or IMAP, depending on the Incoming Protocol you prefer. In this article, we have selected IMAP.

Step 3: Refer to the Email Client Settings below, and based on your preferences, enter the respective hostnames, port numbers, and encryption methods for the Incoming Mail and Outgoing Mail servers.
Enter the following information
- Your Name: Customers Name
- Email address: example@customersdomain.com
- Incoming Server: pop.netfirms.com or imap.netfirms.com
- Outgoing Mail server: smtp.netfirms.com
- User name: Customers Email Address [example@customersdomain.com]
- Password: Password to the customer's email address
Click on Next.
Step 4: Enter the password for your email account with us and click on Connect.

Step 5: Your email account has been configured successfully!
Click on Done to conclude the process.
Step 6: You can now send and receive emails on your Email Client.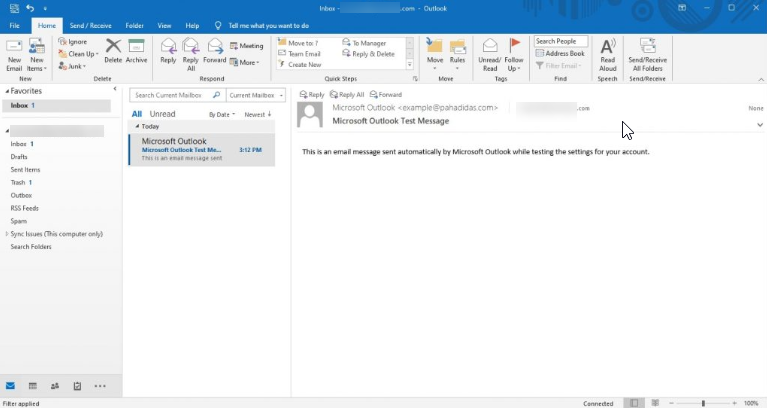
Back to top
Setting up Outlook 365
The instructions below will guide you through configuring the Email Account with us on Microsoft Outlook 365.
Note: In the example below, we will configure the email account using SSL Hostnames for SMTP and IMAP protocols.
Step 1: Launch Microsoft Outlook 365 on your computer. If you are launching it for the first time, you will directly see the window as shown below. If you have some other email accounts configured on Outlook already, you can click on File Menu > Add Account to see the window as shown below.
a. Enter your Email Address.
b. Check the box that reads, "Let me set up my account manually."
c. Click on Connect.
Step 2: Select POP or IMAP depending on the Incoming Protocol you prefer. In this article, we have selected IMAP.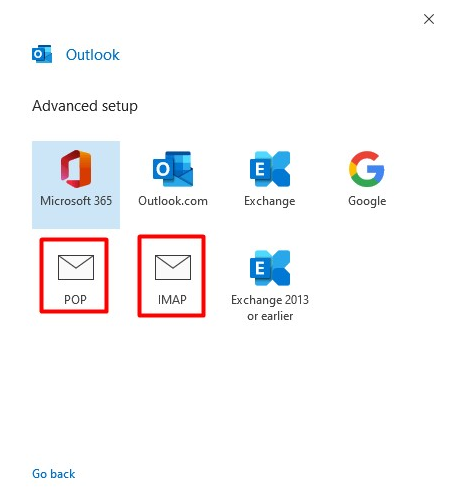
Step 3: Refer to the Email Client Settings below, and based on your preferences, enter the respective hostnames, port numbers, and encryption methods for the Incoming Mail and Outgoing Mail servers.
Enter the following information
- Your Name: Customers Name
- Email address: example@customersdomain.com
- Incoming Server: pop.netfirms.com or imap.netfirms.com
- Outgoing Mail server: smtp.netfirms.com
- User name: Customers Email Address [example@customersdomain.com]
- Password: Password to the customer's email address
Click on Next.
Step 4: Enter the password for your email account with us and click on Connect.

Step 5: Your email account has been configured successfully!
Click on Done to conclude the process.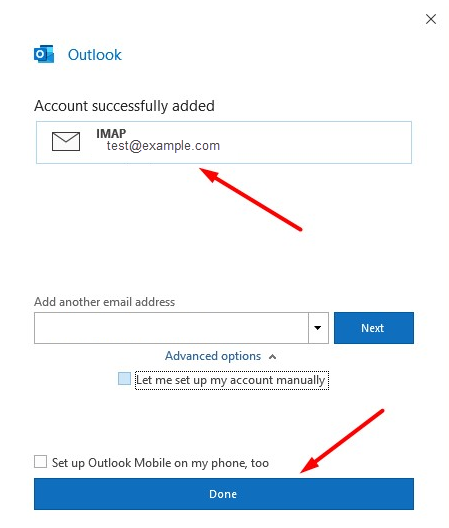
Step 6: You can now send and receive emails on your Email Client.
I followed the instructions, but I still can't connect. What can I do?
- Refer to the generic troubleshooting steps for email client setup.
- Consult Microsoft's support page for Outlook 2016, Outlook 2019, and Outlook 365.
- Contact us so that we can help you troubleshoot the issue.
