WebsiteBuilder: Store Layouts
Selecting the best layout for your online store is an important thing to take into consideration. This article will provide you some guidelines and a walkthrough process in selecting a Store Layout in WebsiteBuilder. Note that you should be in an Ecommerce Plan for WebsiteBuilder.This feature is not available in the Legacy WebsiteBuilder Editor. The steps are for WebsiteBuilder Express Editor only.
How to select a Store Layout?
- Log in to your Domains Dashboard.

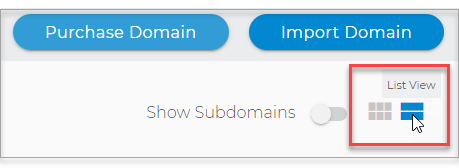
- There are two views in the Domains dashboard - the Card and List views. Click on the view icons to switch to your preferred view.
- Choose the domain where your WebsiteBuilder is situated.
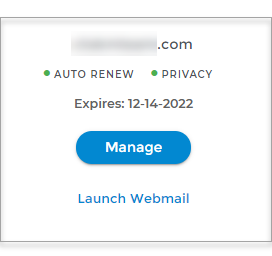
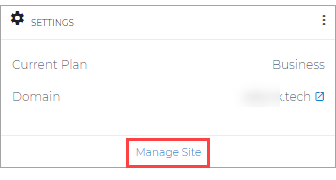
In the Card view, click the domain's Manage button.
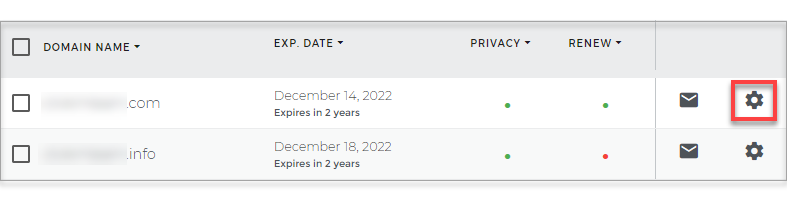
In List view, click the domain or its gear icon on the right-hand side.
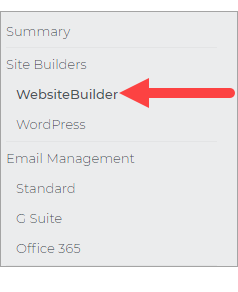
- On the left pane, click on WebsiteBuilder, under Site Builders.
- To launch your WebsiteBuilder Editor, click Manage Site.
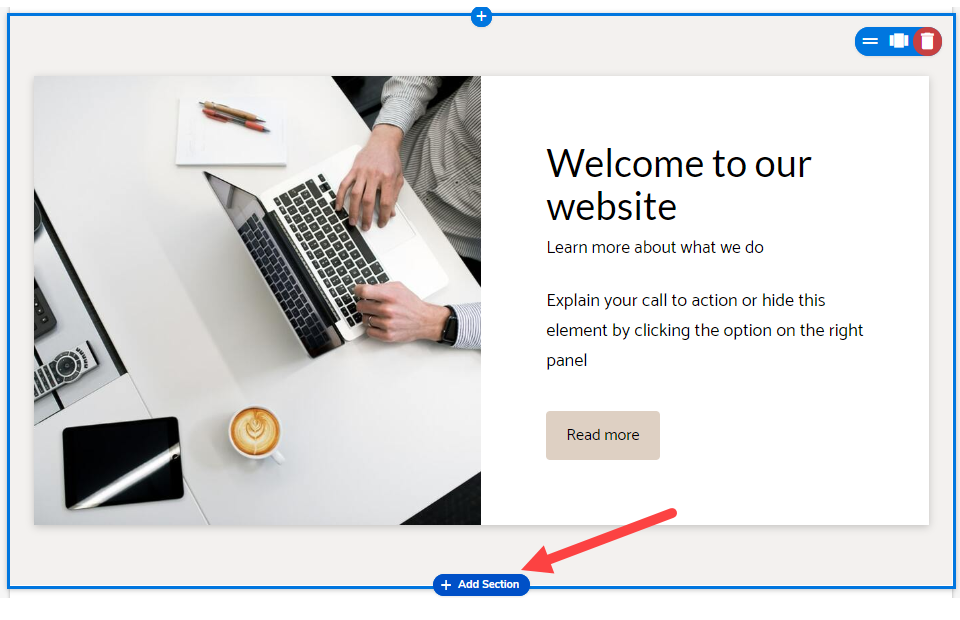
- Analyze where you want to place the store section on your website, then hover your mouse to the plus sign that says Add Section.
- A categorized list of sections will slide on the left, then click on Store under Recommended. The next column provides a preview of Simple Store Layouts, Featured Products Layouts, and Advanced Store Layouts.
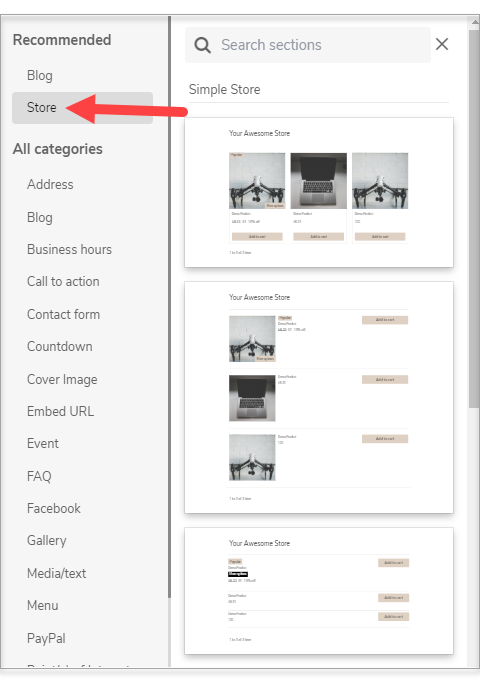
Simple Store Layouts
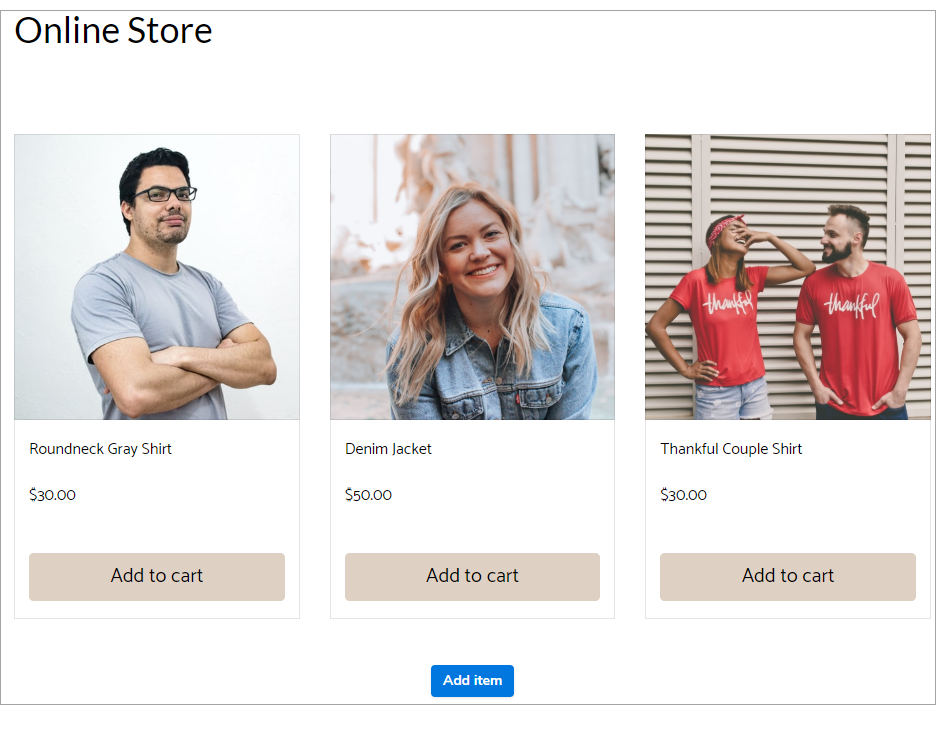
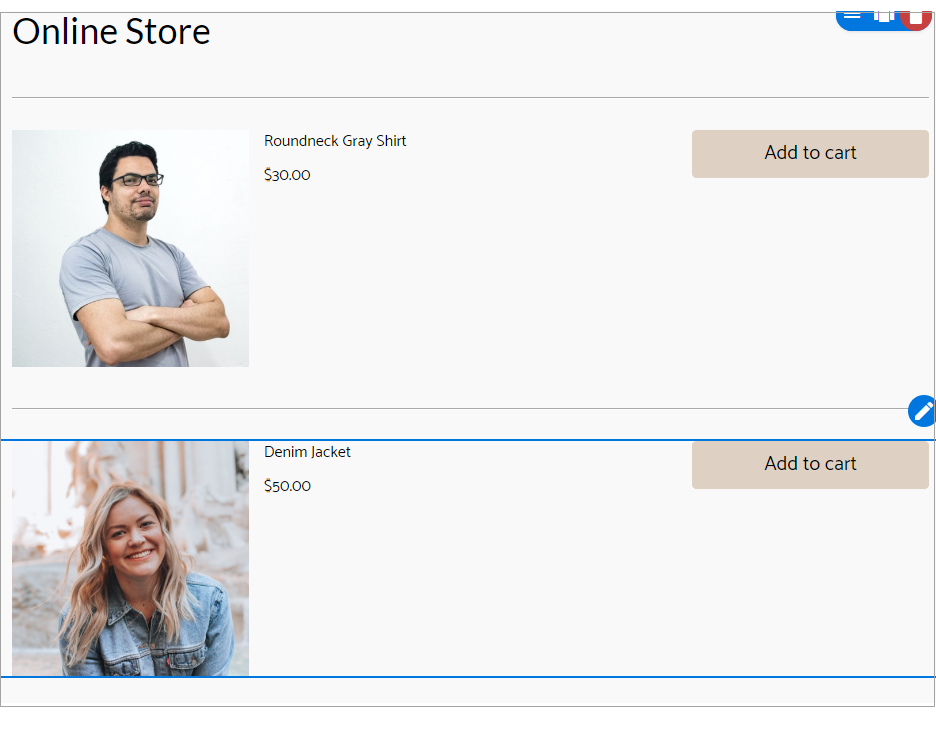
- Grid View: This is the default section that is added to the store page. Items are organized like a spreadsheet. You can customize it using the right pane options.
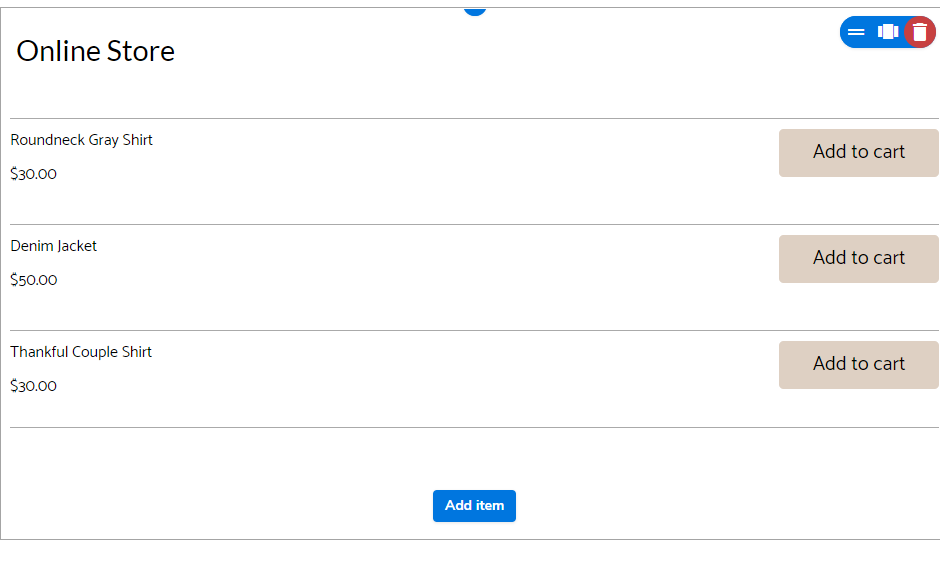
- Horizontal View: Allows items to be stacked top to bottom down the page.
- No Images View: Includes the text and purchase path but no images.
Featured Products Layouts
-
Featured Product: It provides a great space on your website to feature a product that carries your brand or sometimes your best-seller item. The right pane provides customization for this featured product.

Note: Once editing is done, click the Save button in the top section of your editor. And once that you are ready to make changes public hit Publish. Note that by saving changes, it will not appear on the live website until you publish changes.
Related Website Builder Articles:
WebsiteBuilderWebsiteBuilder: How to Access and Edit Your Site
WebsiteBuilder: Getting Started - Videos
Websiteuilder: Adding Content
WebsiteBuilder: Adding a Page
WebsiteBuilder: Adding and Deleting Pages
WebsiteBuilder: How to Add Images
WebsiteBuilder: How to Add Links and Documents
WebsiteBuilder: How to Remove a WebsiteBuilder Website
Websitebuilder: Selecting a Template