| 5.5 Creating a Website with NetObjects Fusion 8 |
| |
| NetObjects Fusion 8 is a complete webdesign application, combining intuitive wizards, templates and one click publishing with advanced HTML editing capabilities. This software is included on the Netfirms Starter CD, which is available through the Account menu tab. |
| |
Steps to create a website:
- Double click the NetObjects icon on your desktop (you must have the software installed first, follow the installation instructions on the CD case).
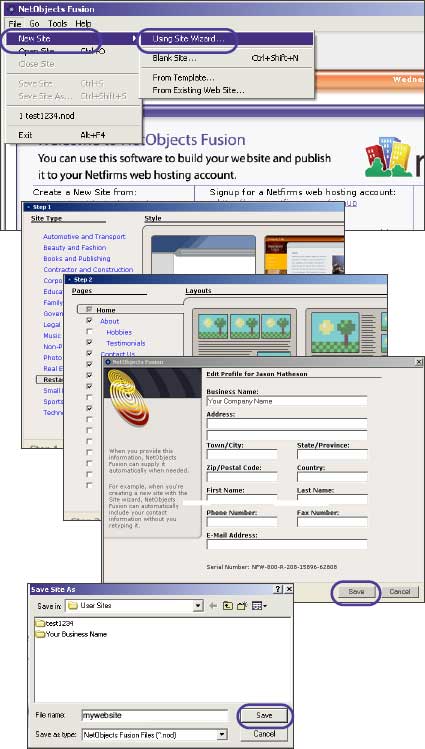
- Click the File menu item.
- Click the New Site option.
- Click the Using Site Wizard option, and click Next.
- Select a Site Type based on the type of website you wish to create.
- For each Site Type there are a number of visual styles to choose from. Select a Style and click the Next button.
- Check the pages you wish to include as part of your website from the Pages list.
- For each Page there is a number of Layouts to choose from. Select a Layout for each page and click the Next button.
- Fill out your business name and any other information you want to include on your website Contact page, then click Finish.
- You will be prompted to save your website. Enter a name in the File Name text field and click the Save button.
- You will be presented with a tree-style flowchart of your web page. Doubleclick the pages to modify them. To get back to the flowchart click the Site icon in the menu bar.
- To Publish your website to your Netfirms account refer to section 5.6.
|
| Notes: For additional style templates click the Style icon in the menu bar and then select Online Style. |
|
|
|