Configuring your site using CuteFTP
Configuring your site using CuteFTP
This tutorial assumes you already have CuteFTP and run it on your computer but are not connected to another server.
Now let's learn how to configure our website in CuteFTP.
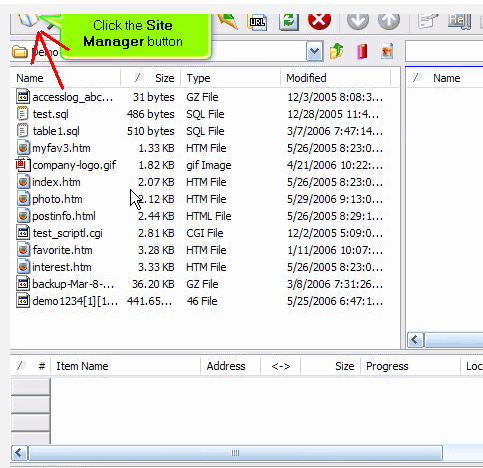
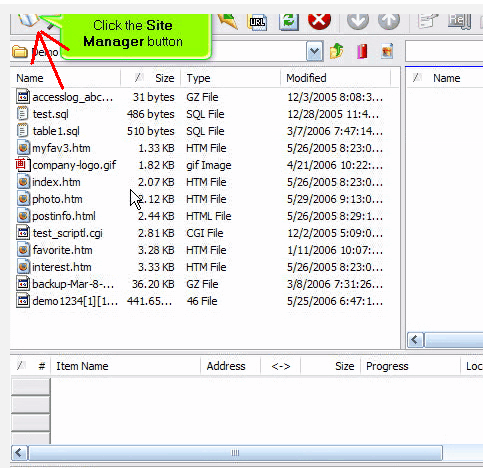
1. Click the Site Manager button.
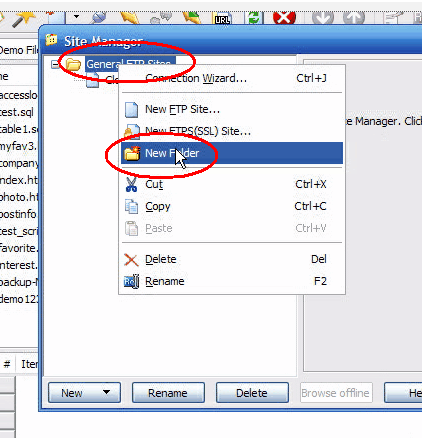
2. Right-click the 'General FTP Sites' folder, then click New Folder from the drop-down menu.
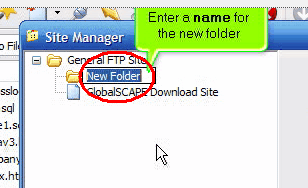
3. Enter a name for the new folder.
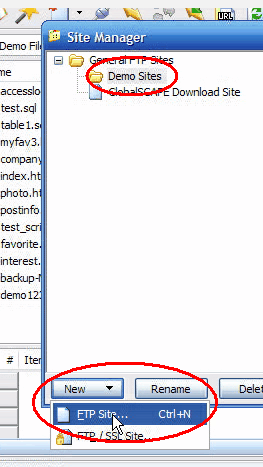
Now, let's configure a new site inside this new folder.
1. Click New, then click FTP Site...
2. Enter a name or label for this new site (for your reference only).
3. Enter the host address.
- The host address can be in the form ftp.yourdomainname.com or just the IP address.
- If your domain name has not yet propagated, then you'll have to use the IP address method.
4. Enter your FTP username and your FTP user password.
5. Click Exit when finished.
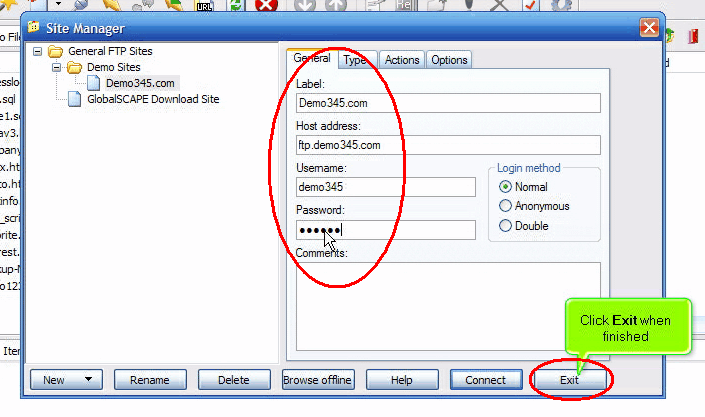
That's it! We've successfully configured a new site in CuteFTP.
To connect to the website we just configured:
1. Click the Site Manager icon.
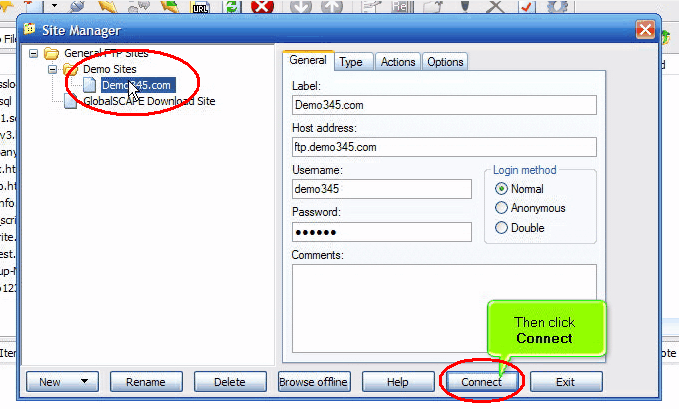
2. Select the site you want to connect to, then click Connect.
3. Click OK.
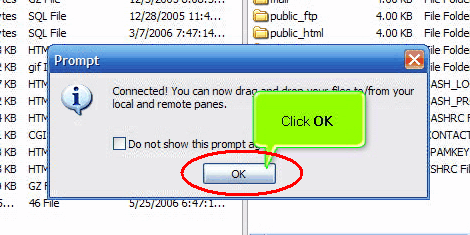
That's it! We've successfully connected to our website via FTP.
Click the Disconnect icon to close the connection.
