WebsiteBuilder: How to Add Images
Images give life and add value to your website, engaging your visitors to spend more time with your content. Follow the steps below and learn how to add images to your site.
NOTE: We offer two different versions of WebsiteBuilder. Our original implementation of the builder is the Legacy WebsiteBuilder Editor, while WebsiteBuilder Express Editor is the newest interface commonly found in the Foundation dashboard. It is not possible to upgrade a Legacy WebsiteBuilder Editor to the Express Editor. The site will need to be recreated with the Express Editor. All new WebsiteBuilder installations will be the Express Editor.
Follow the instructions that match your WebsiteBuilder version.
How to check if I have Legacy WebsiteBuilder Editor or Express Editor?
| Legacy WebsiteBuilder | WebsiteBuilder Express Editor |
 |
 |
How to launch WebsiteBuilder
How to Add Images in Legacy Editor
How to Add Images in Express Editor
How to launch WebsiteBuilder?
- Log in to your Domains Dashboard.

- On the dashboard, select the domain where your WebsiteBuilder is situated.
There are two views in the Domains dashboard - the Card and List views. Click on the view icons to switch to your preferred view.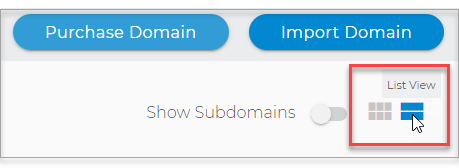
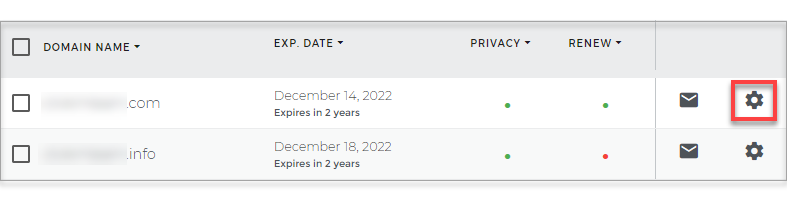
- Choose the domain you wish to modify.
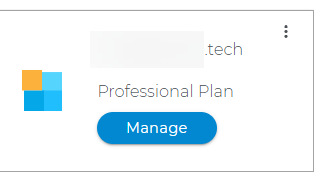
In the Card view, click the domain's Manage button.
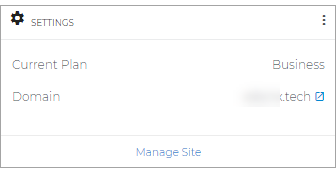
In List view, click the domain or its gear icon on the right-hand side.
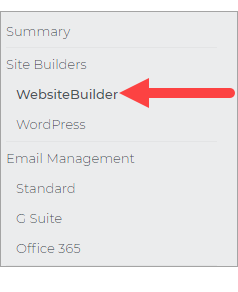
- Click on WebsiteBuilder on the left menu.
Legacy WebsiteBuilder: How to Add Images?
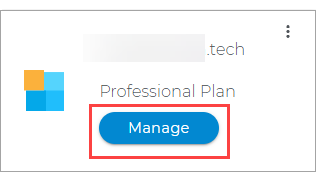
- To launch your Legacy WebsiteBuilder Editor, click Manage.
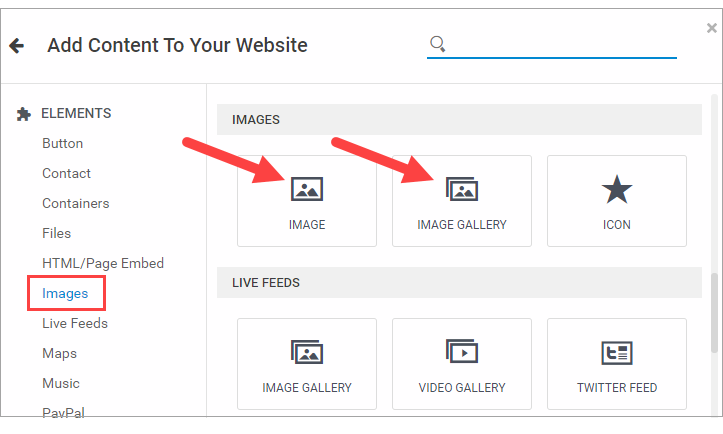
- On the left pane, click on Elements.
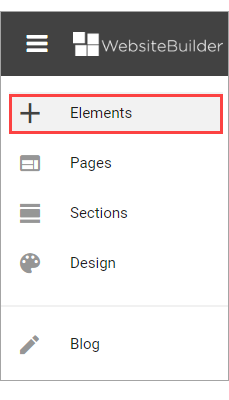
- Navigate through the listed options and select Images; then, you can add a single Image or an Image Gallery, depending on your need.
- Click on Upload Images or Add Image From Link.
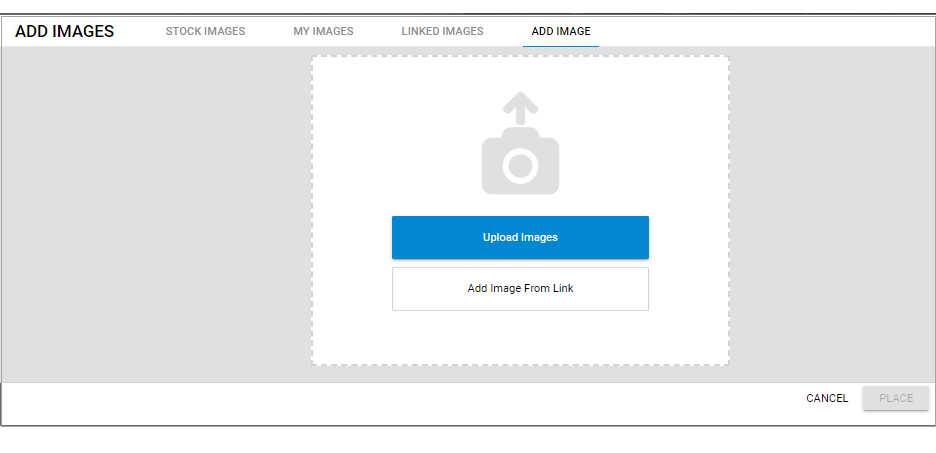
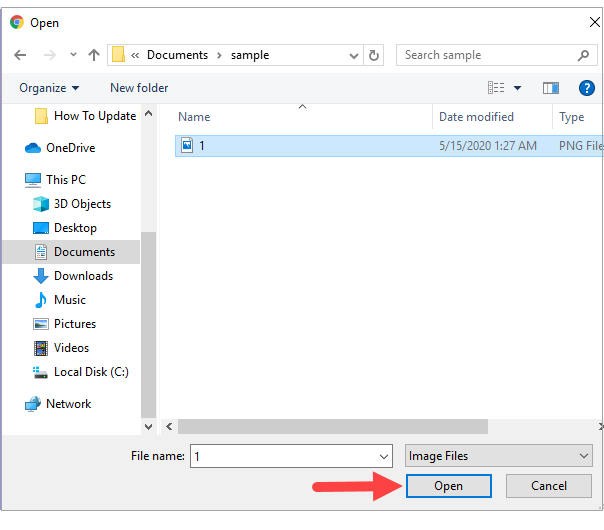
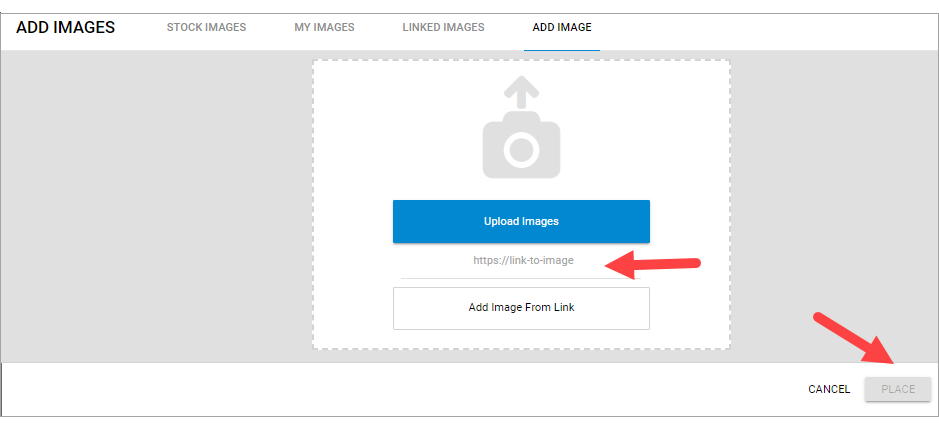
- For Upload Image procedure: Browse through your files, select and open the image. For Add Image from Link procedure: simply paste the link of the image in the field provided.
- Once the image is added, adjust it accordingly.

- Once editing is done, click on Save. If you want to make all changes to be updated on your live website, click Publish. Both these options are placed on top of your editor. Note: if you only save changes, it would not appear on the website unless you click Publish.

WebsiteBuilder Express Editor: How to Add Images?
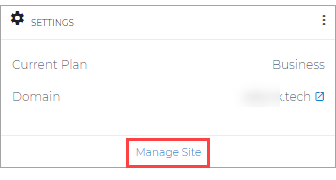
- To launch your WebsiteBuilder Express Editor, click ManageSite.
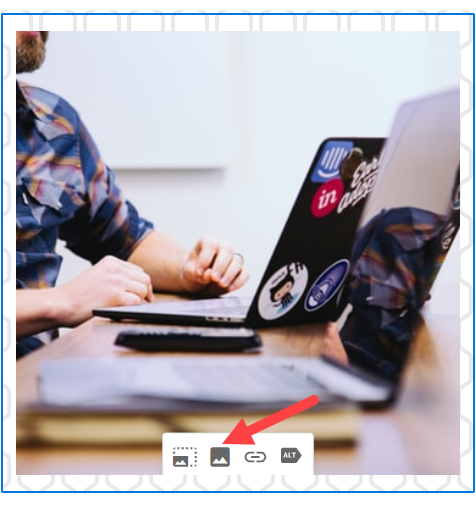
- Choose an area with an image and select the picture icon to open the Image Library.
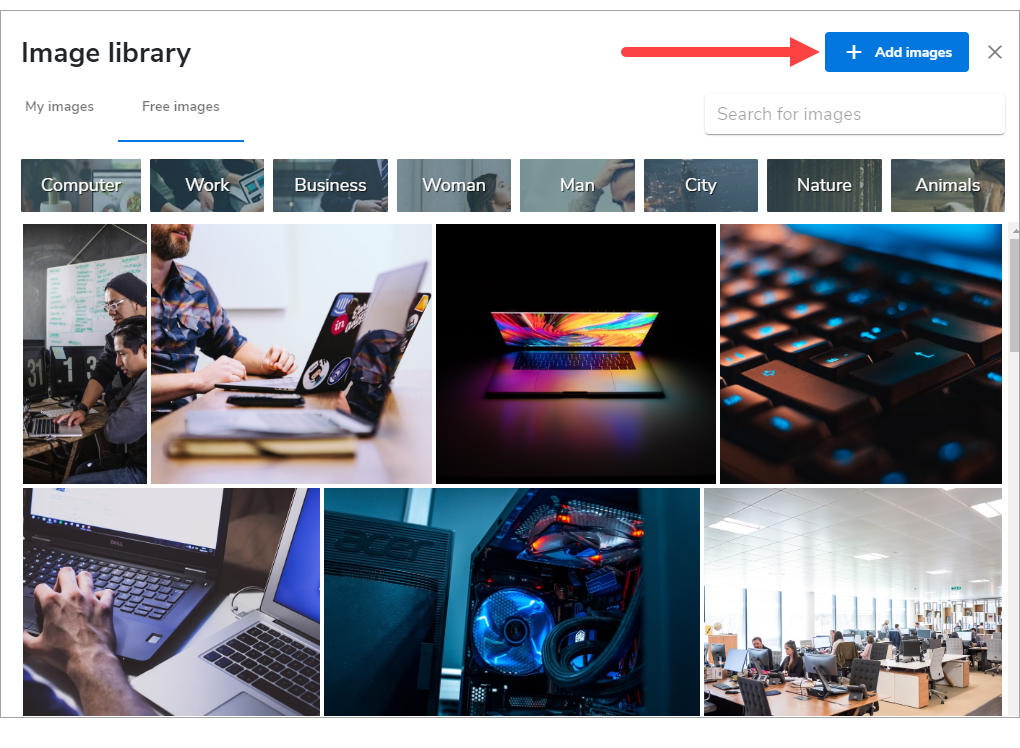
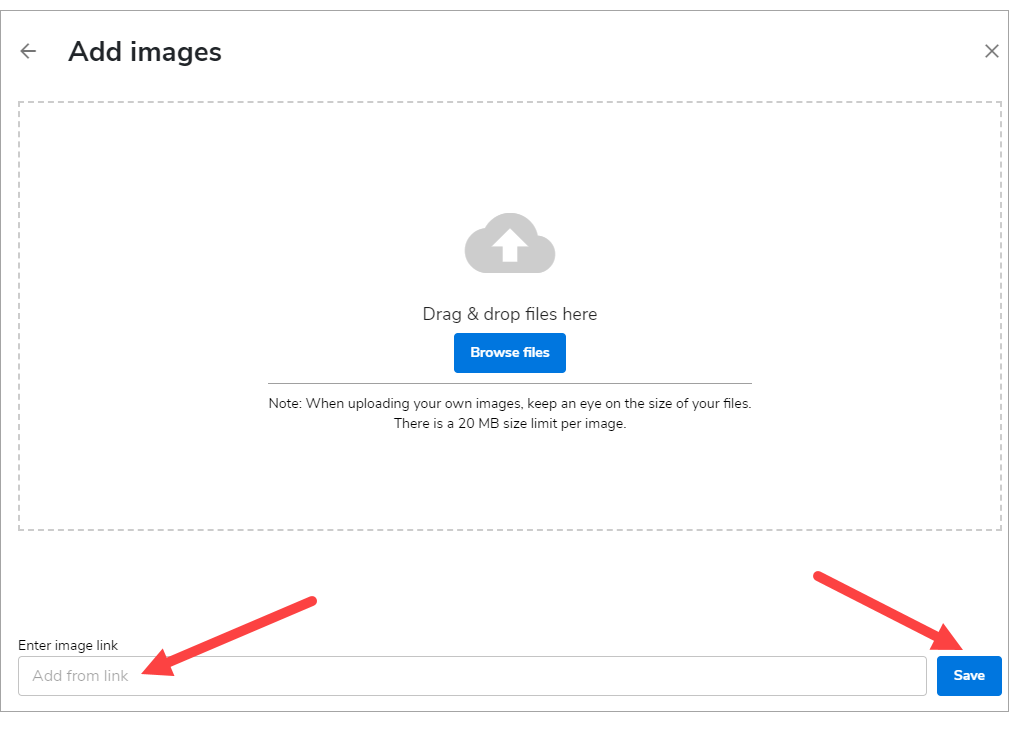
- In the upper right, select the blue button that says Add Images.
- Browse files - by clicking on this option, you will be able to browse through your computer files or drag and drop the file inside the dotted lines. The initially selected image will be replaced with the new image. You will also have the option to adjust the image if needed.
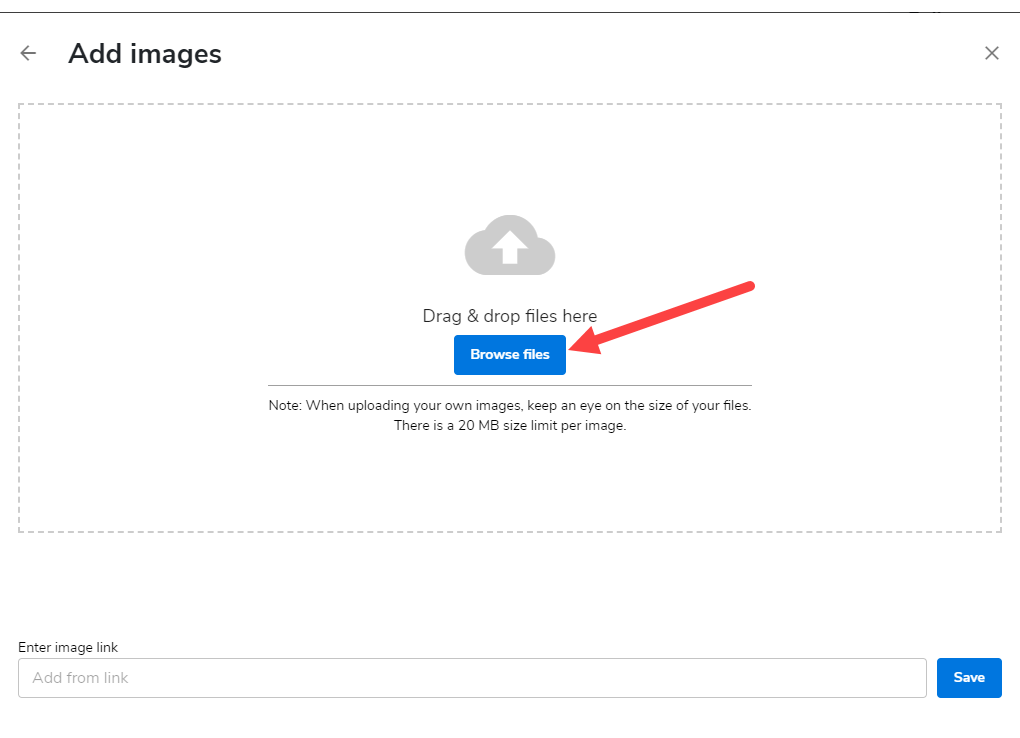
- Add from Link - by selecting this option, you will paste a full URL of an image that already exists on the web in the space provided. Make sure to click Save.
- Once editing is done, click on Save. If you want to make all changes to be updated on your live website, click Publish. Both these options are placed on top of your editor. Note: if you only save changes, it would not appear on the website unless you click Publish.

WebsiteBuilder has its own set of images that you can browse through the Stock Images. Hundreds of pictures are enlisted per category. You may visit this Knowledgebase article, WebsiteBuilder: How to Add Stock Images to know-how.
Back to top.
Please click here to reach our customer service for further assistance.
Related Article/s:
WebsiteBuilder: How to Adjust and Edit Images
WebsiteBuilder: How to Adjust and Edit Images - Video
WebsiteBuilder: How to Add a Header Image